Thursday, July 23, 2020

Chunky Hair Bows

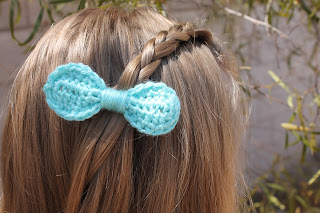
Hello and Welcome to my blog!  Today I'm going to share with you my pattern for these cute Chunky Hair Bows.  They are so fun to make and take no time at all!  I shouldn't really call them hair bows because you can use them for anything!  For example, I'm going to put one on a hat that I'm making right now and you can also put them on bags, clothing, artwork....the possibilities are endless.  You can even use them as little boys bow ties, ooooo that would be cute!  Anyway, let's get into this tutorial....


So, first of all, let's talk about what you'll need;

- Chunky yarn size 6 - if you're making a big chunky bow like I'm wearing above
- Size 4 worsted weight yarn - if you're making a regular sized bow like my daughter is wearing.
- Size L-8mm crochet hook (for size 4 yarn - size J-6mm hook)
- Embroidery needle - to weave in your ends
- Scissors 
- Stitch marker

Stitch Key

Ch. - chain
St(s) - stitch(es)
SC - single crochet
Hdc - half double crochet
Slst - slip stitch

Ch. 12
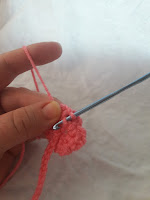
Round 1:  In the 3rd ch. from hook, 1 Hdc. Then 1 Hdc in each of the next 3 Sts., then 1 Sc in next two Sts. then 4 Hdc in next 3 sts., then 3 Hdc in next st. then 1 Hdc in next 4 sts. then 1 Sc in next 2 sts, then 1 Hdc in next 3 sts, then 3 Hdc in next st.  Slst in 1st Hdc (to close up that space)
Note* If you'd like a different color for the trim (like the bottom picture) this is where you'll change colors. 
Round 2:  Ch. 1, then 1Sc in next 8 sts, then 2 Sc in next 2 st, then 1 Sc in next 8 sts, then 2 Sc in next 2 sts. Slst in 1st Sc. Then tie off and weave in your ends. 
Fold center of bow like an accordian and wrap yarn around, making sure that the end that you start with is long enough to tie in a knot.  Keep wrapping around the bow, making sure you have the wrap centered and wrap as much as you like then tie in a knot and weave those ends under the wrapped yarn and You're done!  See I told it was quick and easy! 

Thanks for coming over and learning from me!  I truly hope you and you're family and friends are doing well!  Have a great day and come back soon. 


Friday, March 22, 2019

Bobble Slouch Hat

Bobble Slouch Hat
Crocheted Slouch Hat beginner2.jpgDoll Crocheted Slouch Hat.jpg
I love this pattern! It was so fun to create.
I especially loved the bobble stitch, such a
fun stitch to do! This pattern is available in
my Etsy shop.

Monday, June 11, 2018

Pretty Little Sunhats


This little sunhat might just turn some heads this summer just because it's so cute!
It's such a quick and fun hat to crochet, even for the most novice of crocheters.  I had so much fun creating this pattern.   

You can purchase the pattern for this hat in my Etsy shop!
If you purchase this pattern and make this hat, please share it on my Instagram with the #bbprettylittlesunhats

 Hats off to you!  

Hope you enjoy this pattern and sunhat!

What are your plans this summer?

Thanks for coming over to my blog!


Wednesday, March 21, 2018

Crocheted Easter Baskets

Crocheted Easter Baskets
by:  Britta's Bounty


Level: Beginner 
Materials:  Worsted-weight yarn -  size 4, any color(s) of choice
                    Crochet hook - size I-K ( I used a K) 
                    Scissors
                    Embroidery needle for weaving ends in

Stitch Key:  Hdc. - Half double crochet
                     Dc. - Double crochet
                     FpDc - Front-post Double crochet
                     BpDc - Back-post Double crochet
                     Sc. - Single crochet
                     Ch. - Chain
                     Slst. - Slip stitch 
                     St. - Stitch
Note:  If you need a tutorial for the Weave stitch (FpDc & BpDc), you can go to my YouTube channel to view it.  

Round 1:  Ch. 1, then work 8 Hdc. in 1st chain.  Then Slst. in first Hdc. (8)
Round 2:  Ch 2, then do 2 Hdc. in each st. around. Then Slst in first Hdc.  (16)
Round 3:  Ch. 2, then (do 2 Hdc in next st., then 1 Hdc in next st.) Repeat ( ) for the round (24) Then Slst in 1st Hdc.
Round 4:  Ch. 2, then (do 2 Hdc. in next st., then 1 Hdc in next 2 st.) Repeat ( ) for the round (32) then slst. in 1st Hdc. 
Round 5:  Ch. 2, then (do 2 Hdc. in next st., then 1 Hdc in next 3 st.) Repeat ( ) for the round (40) then Slst in 1st Hdc.  
Round 6:  Ch. 2, then (do 2 Hdc in next st., then 1 Hdc in next 4st.) Repeat ( ) for the round (48) then Slst in 1st Hdc. 
Round 7:  Ch. 2, then (do 2 Hdc in next st., then 1 Hdc in next 5 st.)  Repeat ( ) for the round (56) then Slst in 1st Hdc.
Round 8:  Ch. 2, then (do 2 Hdc in next st., then 1 Hdc in next 6 st.)  Repeat ( ) for the round (64) then Slst in 1st Hdc.
Round 9: [IN BACK LOOPS ONLY] Ch. 2, then (do 2 Hdc in next st. then 1 Hdc in next 7 st.) Repeat ( ) for the round (72) then Slst in 1st Hdc.
Round 10: Ch. 2, then (do 2 Hdc in next st, then 1 Hdc in next 8 st.) Repeat ( ) for the round (80) then Slst in 1st Hdc.
Round 11: Ch. 2, then do 1 Dc. in each st. around.  (80)
Round 12-15: Ch. 2, then (do 1FpDc. in next 4 st(s), then 1 BpDc. in next 4 st(s).) Repeat ( ) for the round.  Slst in 1st FpDc.
Round 16-18:  Ch. 2, do 1 Hdc. in each st. around.  Slst. in 1st Hdc. 

Handle of Basket #1


Row 1:  1 Sc. in each of next 20 st(s).  Ch. 1, turn
Row 2:  In the same st. as the ch., do 1 Sc., then do 1 Sc in each of next 19 st(s) across.  Ch. 1, turn. 
Row 3-7 [or until you have 10 st(s)]:  Do a dec., then do 1 Sc. in each of next st(s), then do 1 dec. at the end of row. Ch. 1, turn.
Now you will be crocheting three straps to be braided.  
For the first strap:  1 Sc. in next 3 st(s), ch. 1, turn. Repeat that until the strap in long enough for the desired strap length. Tie off.  Do the same for the other two straps, [You will need to do a Dec. when starting the last strap]. Then braid the straps together, loosely keeping them flat. Then secure them together until they are crocheted together.  [NOTE: When crocheting the straps, you can get creative and change the color of each strap if you'd like]
With the same color as the basket, start single crocheting (Sc) the braided straps together by doing 1 Sc in each st. (9) Ch. 1, turn. Then do the reverse of Rows 1-7.  Instead of doing Dec.'s do Inc.'s.  On the last row turn the basket inside out and Slst each st. in the last row to the edge of the basket.  

Handle of Basket #2 
Finish and tie off basket.  
Row 1:  Ch. 11
Row 2: In 2nd Ch from hook, start doing 1 Sc in each Ch across. Ch. 1, turn.
Row 3:  Starting in the same St as your Ch, do 1 Sc in each St across. (10) Ch. 1, turn. 
Repeat Row 3 until you have the length that you want.  
When your handle is as long as you want it, either Slst or sew it to the top of the basket.  


Handle of Basket #3
Finish/tie off basket. 
For this handle you're going to make three straps to braid together.
Row 1:  Ch. 4
Row 2:  Starting in the 2nd Ch from hook, do 1 Sc in each Ch. Ch 1 turn.
Row 3:  Starting in the same St as your Ch, do 1 Sc in each St across (3)
Repeat row 3 until it reaches about 24".  (That should make it about 20" when braided, if you'd like a longer handle then keep going and make it longer ;)) 
When you have three straps, sew or Slst each one to the top edge of the basket, next to each other.  Then, start braiding loosely, keeping the straps flat.  When you come to the end use some kind of clip to hold the braid together while you sew or Slst to the other side of the basket.  (NOTE:  If you don't like the floppy handles and would like to have them stay up, then you can buy thin wire at any craft store and sew it through each side of the handle.)

                                                                   Aaaaaaaaaaand


You're Finished!


Hope you enjoyed making this Easter basket.  It was a lot of fun to create this pattern.
If you have any questions/comments I'd love to hear them in the comment section below!

Have a wonderful day and a very happy Easter!

Tuesday, August 15, 2017

Crocheted Flower Bookmarks

These bookmarks are so fun and quick to make.  It is the best crochet project for beginners.

What you will need...
                    Yarn
                    Crochet hook size F/3.75mm
                    Scissors
                    Embroidery needle
Ch. 5
Round 1:  Slst. in 1st chain, then Sc 10 in ring.


Round 2:  (Slst in 1st Sc then in the next Sc fit 5 Hdc), repeat from ( )
End with a Slst.
Ch. 45 or the length of your book.
 In 5th chain from hook Slst.
Which gives you a little ring.
In ring do 10 Sc

(Slst in 1st Sc then fit 3 Hdc in next Sc) Repeat from ( )

End with Slst
Finish off and weave in tail sewing the chain to the flower.

And You're finished!


Happy Reading! 

Monday, August 14, 2017

Essential Oils For Back To School

I can't believe it's already time to go back to school!  Summer went too darn fast am I right?  Isn't that how it always goes?!  Get them ready both physically with school supplies AND mentally with the right essential oils that can help them feel less anxious for their first day, help them focus on what they're learning through out the year and of course keep their immune systems healthy and strong so they don't get sick.

One idea I have for back to school is breakfast.  It's the most important meal of the day.  Add some essential oils and help their bodies defend against whatever bug is in that classroom, help them focus on that homework or test, help them to feel less anxious about meeting new kids, giving oral reports, taking important tests, whatever it may be.  Send them off to school prepared!


Here is a recipe for IQ Mega French Toast that I'm sure your kids will love.
1 egg
1/4 cup almond milk
1 teaspoon IQ Mega
Sprinkle of cinnamon
4 slices of whole wheat bread
 Directions:
       1.  Put all ingredients in a shallow bowl and mix well.
       2.  Dunk each slice of bread on both sides and then cook in a skillet over medium heat.
Go here to find out more about IQ Mega.

Next, let's talk about lunch.  Here are a few ideas for lunches...

1.  Wild Orange Peanut Butter Sandwich
2.  Cinnamon Apple Chips
3.  Cinnamon PB and Granola Sandwich
4.  Lemon Kale Chips
5.  Tangerine Fruit Dip

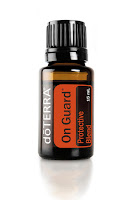
Some essential oils are used for immune support.  They are Wild Orange, doTerra On Guard, Thyme and Lemon.  You can diffuse these oils or rub them on the bottom of their feet or put them in their water.  You can also make a cleansing hand gel to keep in your child's backpack.


Cleansing Hand Gel (with on guard)
5 tablespoons aloe vera gel
4 tablespoons water
1/4 teaspoon vitamin E oil
8-10 drops doTerra On Guard
Small squeeze container
Directions:
         1.  In a bowl, combine aloe vera gel and vitamin E oil.
         2.  Add 8-10 drops of doTerra On Guard
         3.  Add water and mix well.  Add more or less water based on the desired consistency
         4.  Pour into small container for use.

Let's talk about homework.  Aromatherapy is an excellent way to enjoy the benefits of essential oils.
When the kids come home from school and they've had a long day and emotions are high then diffuse some Vetiver.  It can calm them down.

Peppermint is great for those low energy days.  Diffuse peppermint with frankincense and wild orange for added effect.


Some oils can be put directly on the back of the neck.  Two of these oils are PastTense and InTune.  PastTense can help ease stressful feelings and InTune can help sustain a sense of focus.


I hope this post helped you learn something new today.  

What recipe are you going to try?

     Thanks for coming over today!  
If you would like to know more about doTerra Essential oils then go here and if you would like to order some of these oils that I shared today go here or email me at brittabounty@gmail.com.
Have a great rest of your day! 


Wednesday, August 9, 2017

An Introduction to Essential Oils

In the spring of 2008, doTerra, meaning "gift of the earth" was founded.  They wanted to provide high quality essential oils to enhance many lives.  In addition to sharing oils, doTerra aspired to serve people and communities with the resources they had.  Have you heard of doTerra?  Have you always wanted to learn more about it?  Well you're in the right place. 
 
 Why doTerra?
           - Plants are sourced all over the world.  What does that mean?  When the plants are sourced that means that they're in their true environment to produce the best properties in the plant. 
           - Harvested at the most opportune time
           - Every batch is rigorously tested by a third party
           - Testing ensures the absence of toxins, contaminants and assures the presence of desired therapeutic properties.  

 What is an Essential Oil?
           - Extracts from plants
           - Found in the seeds, bark, root, stems, flowers and other parts of plants
           - Highly concentrated (less is more)
           - 50 - 70 times more powerful than herbs
  
How we use essential oils 
           *Aromatically
              Effects mood
              Purifies the air
              Helps maintain a healthy airway
           *Topically
             Apply to the skin or to the bottom of your feet
             Works fast!  Enters the blood stream within 30 seconds
              Dilute with fractionated coconut oil to prevent skin irritation or with hot oils
           *Internally
              Consume as a dietary supplement for targeted wellness
              Supportive to the bodies systems
              Add a drop to a favorite dish for exceptional flavor 

 Essential Oil Tips and Safety
              Keep out of eyes, ears, nose, throat and other sensitive areas
              Dilute with fractionated coconut oil NOT water
              Read label directions
              Use internally only if the bottle has supplemental facts
              When using internally only use glass or stainless steel 

Now let's talk about the 10 most popular oils...

Lemon
        
     Lemon cleanses the air and surfaces, naturally cleanses the body and aids in digestion.  It also supports healthy respiratory function and promotes a positive mood.  

Lavender

      Lavender is widely used for its calming and relaxing qualities, soothes occasional skin irritations and eases feelings of muscle tension.  

 Peppermint 
    
      Peppermint promotes healthy respiratory function and clear breathing, alleviates stomach upset, helps with head aches, and frequently used in toothpaste and chewing gum.  

Melaleuca

      Melaleuca (Tea tree oil) is renowned for its cleansing effect on the skin, promotes healthy immune function, and protects against environmental and seasonal threats.

Oregano

       Oregano is used as a powerful cleansing and purifying agent, provides immune-enhancing benefits, supports healthy digestion and respiratory function and contains antioxidants.

 Frankincense 
        Frankincense is known as the "king of all oils".  It supports healthy cellular function, promotes feelings of relaxation, and reduces the appearance of skin imperfections. 

DigestZen

        DigestZen aids in the digestion of food, soothes occasional stomach upset and helps reduce bloating, gas and occasional indigestion.  

Breathe

        Breathe maintains feelings of clear airways and easy breathing, helps minimize the effects of seasonal threats.  Diffuse at bedtime to promote a restful nights sleep.  

Deep Blue

        Apply to feet and knees before and after exercise.  It's also perfect for a soothing massage after a long day of housework.  Massage with carrier oil onto growing kids legs before bedtime.  

On Guard

       On Guard supports healthy immune and respiratory function, protects against environmental threats, cleanses surfaces and promotes healthy circulation.  

Ordering These Wonderful Oils
When you purchase essential oils through me, not only are you getting them directly from the source, but you are supporting my small, home based business....Thank you!  
When you purchase doTerra essential oils, you become a wholesale member (like Sam's Club or Costco) and receive a discount of 25% on all your oils for one year.  There's a $35 membership fee (that is waved when you purchase an enrollment kit) and then you can get the wholesale prices.  There is never any obligation to purchase every month either.

Here are two of the most popular kits...


The first one is the Home Essentials kit.  It's our number one selling enrollment kit for people just starting out with the oils.  This kit has all 10 of the oils you just read about and has larger 15ml. bottles that have 250 drops in each and a petal diffuser.  It costs $275. 

Our second most popular kit is our Family Essentials kit which has the same oils but they are in smaller 5ml. bottles (85 drops), On Guard and Peppermint beadlets.  This kit costs only $150.  

If you are interested in trying these wonderful oils you can click here or drop me an email and I'll contact you.  

Thanks for coming to my blog today!  Have a great day!